
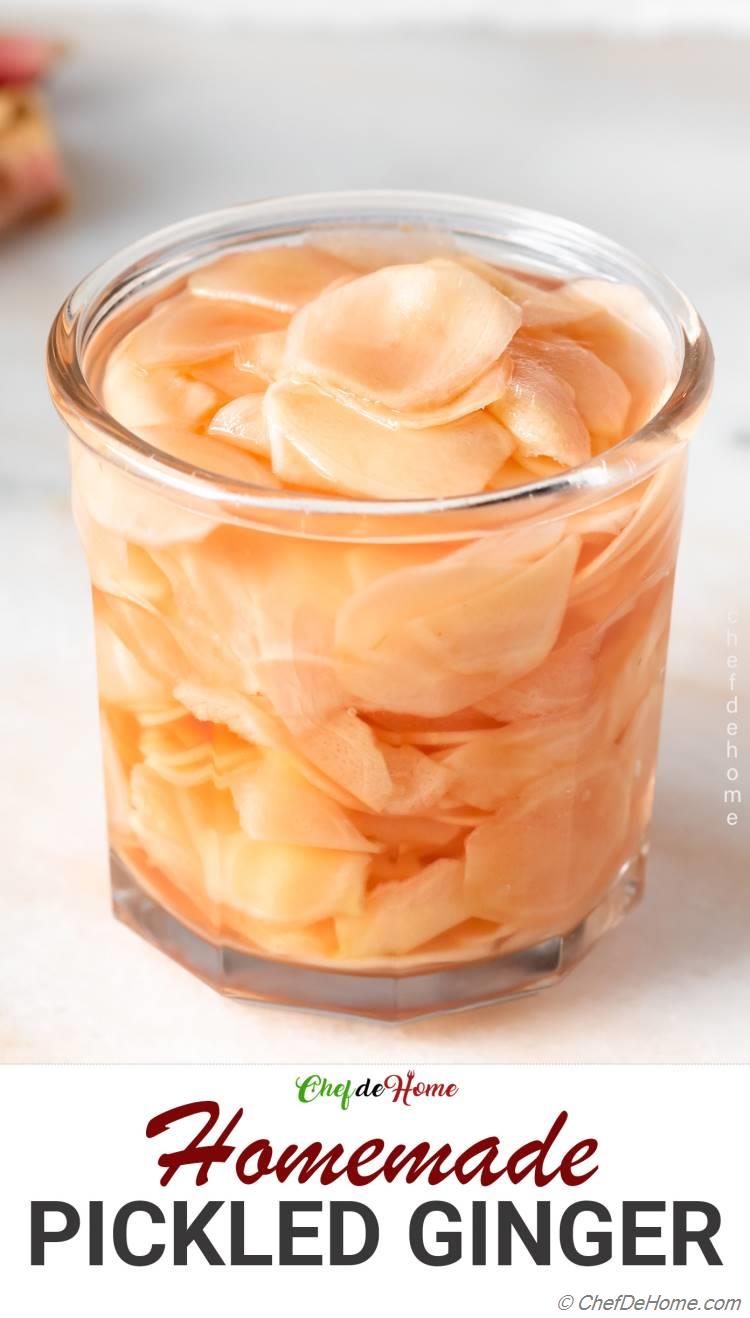
Pickled Ginger (Sushi Ginger)
An easy and delicious homemade Pickled (Sushi) Ginger recipe with flavor just like pink ginger served with Sushi in Japanese Restaurants. Needs only 5 ingredients to make a big batch.
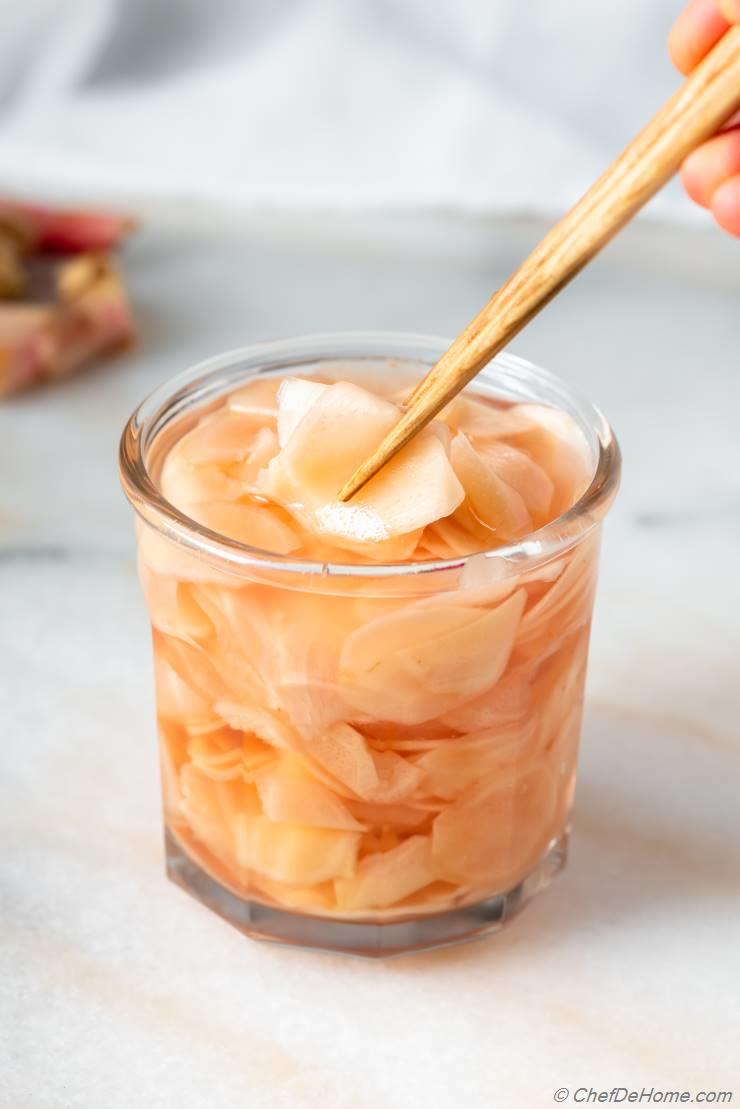
Homemade Pickled (Sushi) Ginger recipe. It needs only 5 ingredients to make pickled ginger at home with flavor just like pink ginger served with Sushi in Japanese Restaurants. Even better as home pickled ginger is free of preservatives and dyes. Make once, enjoy whole month! Gluten free, vegan, dairy free.
Sweet, tangy and slightly pink in color, pickled ginger is my favorite ask whenever I eat Sushi or dine in a Japanese Restaurant. In-fact one such Japanese place in Bay Area is my inspiration to share this recipe with you.
Are you ready for a fun weekend project? I also love pickled ginger stir-fried with spicy udon noodles. (hint hint)
Pickled Ginger
Pickled Sushi Ginger, also known as gari/shoga, is a popular Japanese condiment. Specially very commonly served as palate cleanser with Sushi. Whether you buy pre-packed Sushi from Whole Foods or dine in a fancy Sushi Restaurant, the side of sweet pickled ginger is quintessential.
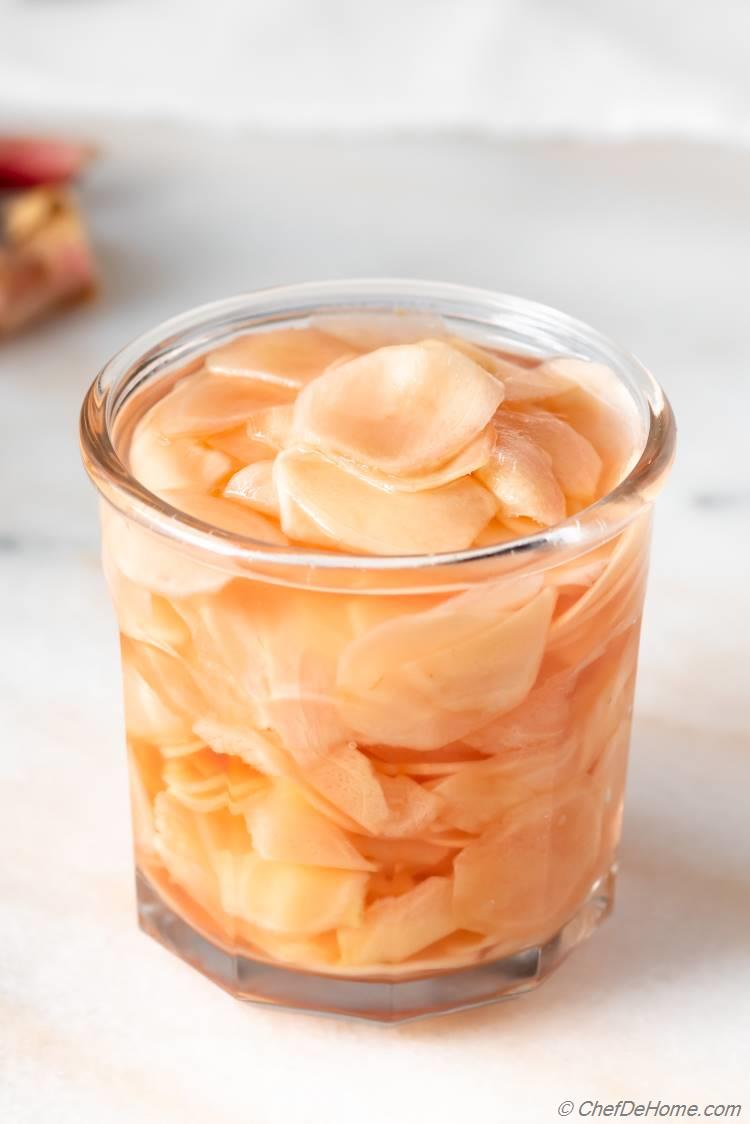
On contrary to store-bought sushi ginger, homemade pickled ginger is pale-pink in color. The store bought ginger's color is enhanced with dyes where homemade version is pale pink due to natural reaction with rice vinegar.
Pickled Ginger is easy to prepare and often served with noodles, rice and sushi. In-fact, it is used heavily in both Chinese and Japanese cuisine. Along with delicious taste, ginger also believed to aid digestion. In my home, it find ways to salads, noodles, spicy fried rice, and of course sushi.
I love to top every sushi roll with pinch of wasabi, a slice of pickled ginger with a drop of soy sauce. Such a delightful combination of sweet, spicy and umami. Craving Sushi? ;-) Ditto!
Let's make pickled ginger today. I have plans to also share my homemade sushi recipe with you.
What Do You Need To Make Pickled Ginger
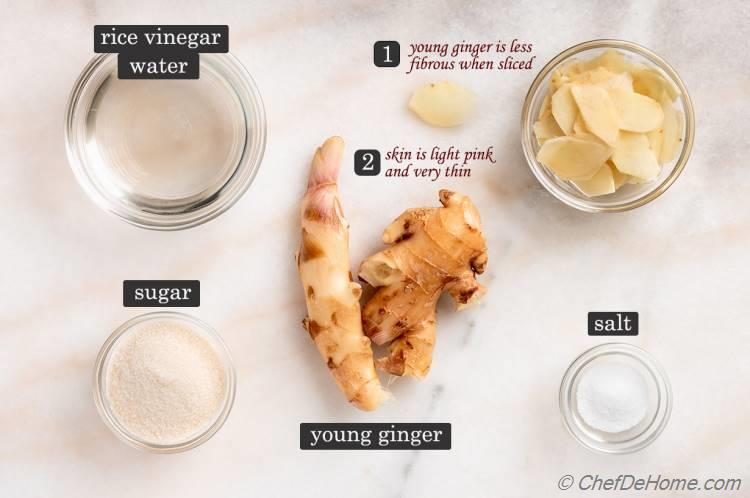
Here are the 5 (easy to find) ingredients to make Pickled Ginger at home:
- Young Non-Fibrous Ginger
- Rice Vinegar
- Sugar
- Salt
- Water
How simple is that?! Right?
What Ginger To Use for Pickled Ginger?
Buy non-fibrous fresh ginger root. Preferably young ginger. (Also known as baby ginger.) Available in most Asian Stores. It is easy to spot a young ginger root. Simply look at the skin. Skin of young ginger has shades of pink, is opaque, thin and so delicate that you can simply rub it off.
Young Ginger is good for pickling because it has wonderful non-fibrous texture. Once pickled, ginger stays crunchy yet gets so delicate that it melts in mouth.
Young ginger is not that spicy and potent as mature ginger. Also, pickling ingredients i.e. Rice vinegar, salt and sugar, further draw out most heat and spicy-ness out of the young ginger. Resulting pickled ginger is sweet, crunchy and as I said, melts in mouth.
You can also use galangal for this recipe.
TIP: In Autumn season (ginger season) you may also find ginger sold in regular produce stores very fresh, less fibrous and totally fine for this pickle.
Pink Ginger
The natural pink color in pickled ginger is very light pale pink (as you can see in the pictures.) Ginger turns naturally light pink when comes in contact with Vinegar or Rice Wine. It's ok for young ginger to release it's pigments and it is safe to eat.
If you ever wonder how sometime Japanese pickled ginger is red rather than pink? The red color dye is added while pickling ginger to make it look bright pink-red and hence more appetizing. However, you will find pink ginger tastes same as red ginger. There is no difference in flavor.
If you ever get chance to find a Japanese food store. Look for fresh pickled ginger in their refrigerator section. They sell both yellow (light pink like this recipe) and deep pink red gingers called Yellow Gari Shoga and Pink/Red Gari Shoga respectively. I have bought both yellow and red pink ginger and found the flavor to be exactly same.
Pickled Ginger - Recipe Testing
When I planned to test pickled ginger recipe for blog... I tried various ways to make pickled ginger, all with different results. I'm sharing the best, my version of pickling method that convinced me on the flavor of pickle ginger.
There were a few winners in my testing. Picture below shows few good ways to pickle ginger. (No. 2, Sushi Ginger is my version of pickled ginger for this post.)
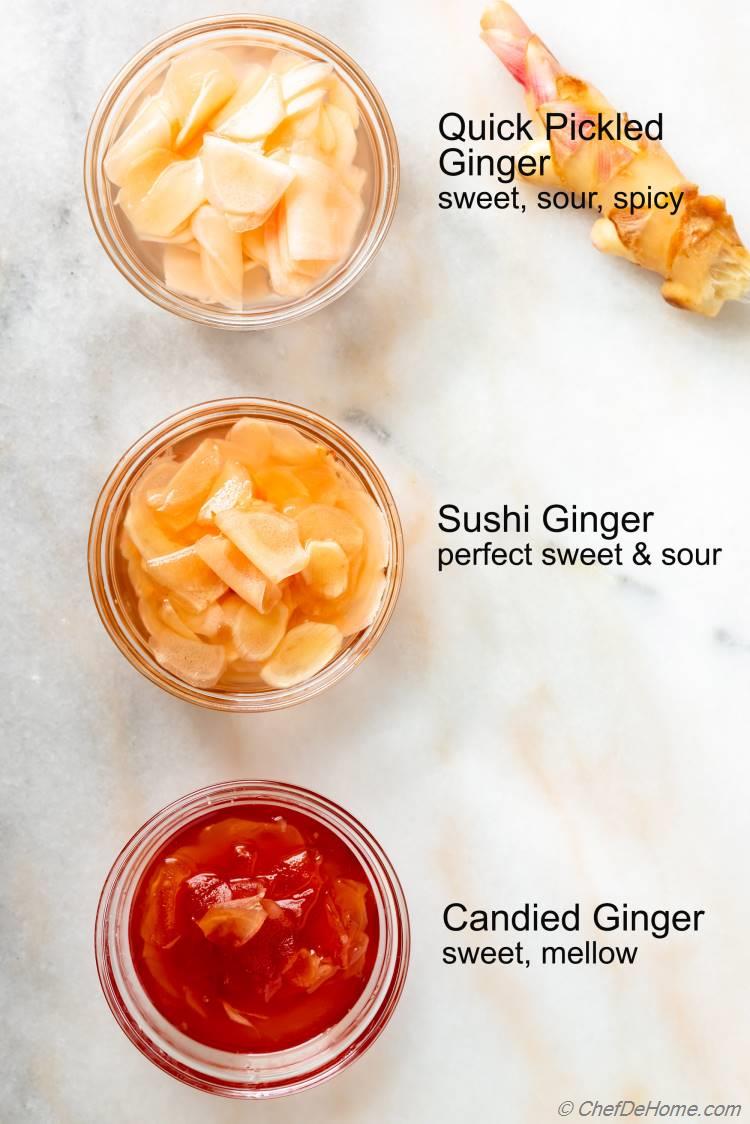
Quick Pickled Ginger
Picture (first from the top) is quick pickled ginger. It needs no cooking time. Only mix the pickling liquid, add to the sliced ginger and refrigerate for 30 minutes. Resulting pickled ginger is sweet, sour, has good crunch but is also sharp and spicy.
If you are ginger fan, this is the ginger recipe for you. To quick pickle ginger, follow the recipe same as described in the recipe card. Only don't cure ginger and no need to heat the liquid, add straight to the ginger and let sit for 30 minutes.
Quick pickled ginger is good to serve with fried rice, stir-fry with noodles or cook chicken.
Sushi Ginger
Sushi Ginger recipe (second picture from the top) is what I have shared in the recipe card. It needs some extra time as ginger is salted and cured to extract spicy-ness out.
To make sushi ginger, ginger is salted. Salting makes ginger sweat and releases the spicy-ness out. Next, pickling liquid is just heated to point until sugar and salt are fully dissolved (not boiled), then ginger is pickled in the liquid. Let ginger pickle come to room temperature and then refrigerate until ready to use.
You can start munching on pickled ginger once pickle cool down to room temperature. For the chilled (sweeter) sushi ginger like you get in sushi restaurants, refrigerate for at-least 30 minutes.
Note: Once at room temperature, if ginger tastes bit spicy. Don't worry. Let it sit in refrigerator for few hours, it will get better, perfectly sweet and less spicy.
Candied Ginger
This was an experiment gone side ways but made a delicious candied pickled ginger. This recipe requires cooking the fresh sliced ginger with pickling liquid for 30 minutes or until liquid thickens and sugar crystalize like candy. Good to top on salads or serve with meat.
This was a long due recipe. I'm so glad to finally share this with you.
Friends, don't shy from trying new things in the kitchen. This weekend, bring home some young ginger (or check above for my tips to find fresh ginger in local produce store.) I'm sure you will find remaining 4 ingredients in your pantry. Make some pickled ginger and enjoy sweet and sour condiment with your favorite meal. A jar of pickled ginger will keep for 1 month in refrigerator.
Happy Cooking! -Savita x
Homemade Pickles and Sauces To Try
Pickled Ginger (Sushi Ginger)
(13 reviews)
Ingredients
Directions
- 1. Wash, Slice and Salt Ginger: Wash ginger and pat dry. Peel or rub off the skin. Using Mandolin slicer, slice each knob of ginger very finely along the grain, into thin slices like rose petals. Places slices in a medium bowl/plate. Sprinkle with 1/2 tsp of salt. Set aside to sweat for at-least 30 minutes, up-to 4 hours.
- 2. Make Pickling Liquid: Place water, vinegar, sugar, and remaining salt into a sauce pan. Heat on low-medium just until sugar has dissolved (don't boil) and take off heat.
- 3. Pickle Ginger: Pat and dry sweated salted ginger slices with a clean towel. Pack slices into a jar or container with lid. Pour warm liquid on the sliced ginger. Set aside to cool completely.
- 4. Refrigerate: Once at room temperature, refrigerate until ready to use. See Note 4 and 5.
Savita's Notes:
- Buy non-fibrous fresh ginger root. Preferably young ginger. (Also known as baby ginger) Available in most Asian markets. However, in Autumn season you may also find ginger sold in regular produce stores in US much fresh, less fibrous and totally fine for this pickle.
- Salt Cure Ginger: Salting and letting ginger sweat extract out spicy-ness of ginger. You can leave ginger salted from 30 mins up-to 4 hours.
- Pickled Ginger will keep for 1 month in refrigerator.
- How Long to Refrigerate Sushi Ginger? - You can start munching on pickled ginger once it is at room temperature. For the chilled sushi ginger like you get in sushi restaurants, refrigerate for at-least 30 minutes.
- Once at room temperature, if ginger tastes bit spicy. Don't worry. Let it sit in refrigerator for few hours, it will get better, perfectly sweet and less spicy.
© Chef De Home. Post content including video and photos are copyright protected.
We Think You'll Love


Blogger behind Chef De Home. (...about me)


Leave a Message:
Did you try the recipe? Do you have feedback or a question? Leave a message below.
30 Responses
Surinder jain
Also I want to know how to cut the sushi ginger so beautifully.Kate
Thank you for posting this recipe. I live in a rural area (west Tennessee) where I cant get it on the shelf. I made my first batch yesterday, doubled the recipe. After having done some research I figured out how to can it. Super simple, and now I have three lovely half pints and two 4 oz jars ready for the pantry and soon to be gobbled up. For those who have asked about canning: Of course, follow the usual overall canning guidelines. For this recipe 14" headspace, waterbath 10 minutes for 12 pints & 4 oz jars, 15 minutes for pints.Gail
Can I use regular vinigarSavita
Depends on what vinegar you have. Rice vinegar is mild. If vinegar you have is very sharp, use less/dilute.Heidi
Hi Savita! I would like to try your recipe, but I’m not sure how to determine if ginger is young or fibrous. What do I look for?Savita
Young ginger’s skin is very fine, is not dry and color at knots bit pinkish. At the very least, skin will be translucent and fresh than mature ginger. If in doubt, you can also make pickle with galangal ginger mostly available in Asian markets. I hope it helps.Ellen
Can this recipe be adapted to canning for longer storage?Savita
I never tried canning this but should be fine to can using regular canning process.Izak
GreatIby
Delicious! Wonderful recipe!Savita
ThanksElizabeth Brown
This turned out delicious. I made a big jar. We finished almost half of it in few weeks with rice and in sandwiches. Very good flavor. Thanks for the recipe.Savita
Thanks for letting me know. 🙌Anita
I love trying new things so I bought some ginger!! Am I able to can this? I’ve seen some recipes that is basically the same thing but water bath can for 30 minutes!Savita
Hi Anita, I have never canned pickled ginger.Pen
Hi Savita! I don’t normally use granulated sugar. Can i use diff kinds of sweetening like raw sugar, honey or maple syrup. Thanks!Savita
Hi Pen, technically raw sugar can be a substitute for granulated sugar. My only concern is that resulting color/flavor will be slightly different. If you are okay with that, raw sugar should be fine.Sherry
Can I use regular ginger for this recipe?Savita
Hi Sherry, regular ginger will be fine when still fresh and non-fibrous. These days most store have non-fibrous ginger. If ginger is hard and fibrous then it's not good for Sushi ginger pickle.Sherry
Can I use regular ginger for this recipe?Cindy
This was delicious!Savita
Thanks for letting me know.Natalie
I always buy pickled ginger in store. But now when I'm going through your recipe, I realized this is easily done at home. I'm going to make a batch. Thanks!Savita
Oh, yeah! Homemade ginger is such a treat and ready in not time. Let me know how it goes!SHANIKA
I love this pickled ginger recipe! I love that you can use this and incorporate it into so many dishes!Gina
I've quick pickled so many things before but never ginger and I don't know why because I could eat sushi ginger by the cupful! Can't wait to give this a try soon!Savita
Our love for sushi ginger is mutual. :) Happy cooking!Tavo
Hey, I wanted to let you know that I just made the recipe, and it was super easy to make; I loved it. We are big fans of ginger. Question: how much time should I leave it in the fridge before using it?Savita
Hi Tavo, thanks for letting me know. You can start munching on pickled ginger once it is at room temperature. For the chilled sushi ginger like you get with sushi, refrigerate for at-least 30 minutes. Enjoy!Lima Ekram
I love pickled ginger and never have enough! Thank you so much for posting this recipe! I can't wait to make it!